Student Dashboard
What is the Student Dashboard?
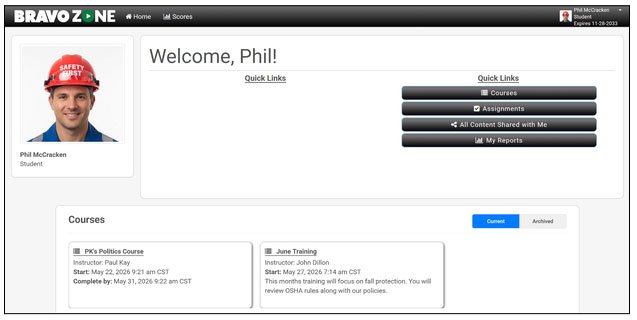
BRAVOZONE now offers organizations an easy-to-use dashboard to create and share content with users who have student accounts. BRAVOZONE allows your users to create Student Accounts, enabling you to control the content users see and when. This includes an easy-to-use Instructor Dashboard to share content. Students will easily be able to see current and past assignments. To learn more about creating a student account, click here.
Why Use Sign-In-Required?
When you create a self-paced session, you can require users to create an account by selecting sign-in-required. There are many advantages to using sign-in-required, which will give you better control of what users will see and do.
What Sign-In Requirement Allows
Restrict what users can see in reports. Don’t want the students to share questions and answers? Restrict what they can see in the Student Dashboard.
Restricts who can have access to a session (Classroom-led or Self-paced)
Restrict the number of plays an end user can play in a Self-paced session.
Will score all sessions and prevent students from starting and quitting a session to learn for a test or improve their results. All results are scored, so if you allow multiple attempts. (Start and don’t finish; it’ll make you finish-it knows where you left off. Records multiple attempts.)
Dedicated dashboard for student accounts to track new and completed assignments.
Control the start and end times for sessions to be played.
Send email notifications to users using the Course Builder.
Every template can “Allow participants to view reports”. When disabled, signed-in users can only see their scores, but not the questions or answers. (Instructors can turn OFF correct answers only in SPARK in assessment mode)
You can create a leaderboard to help students track their scores against others in a course assignment.
When combined with the new Student Dashboard using the new Course Builder feature, you can now compartmentalize reports and Leaderboards to the students assigned to that course. Simply put, if you assign a course to 10 plays, then within that Course you will only see the results for those assigned.
Using URL links for a session (Traditional Method of Sharing Content)
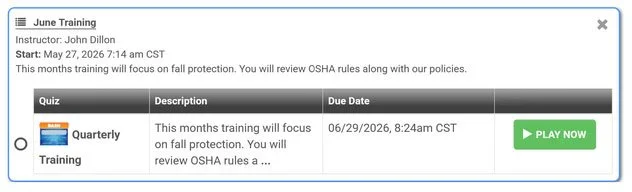
Previously, Instructors would just send out a URL for a session for students to play, with sign-in required turned on. With the new Course Builder, students will be able to see newly assigned courses and review past courses on their dashboard. If a Leaderboard is enabled for a session, students will see the results of how they did compared to others assigned the quiz within that course. Instructors will be able to review reports for only the students assigned to that course. Sessions that require sign-in will provide a link back to the Student Dashboard. However, unless a quiz is included in a course, the student will have to go to My Reports to review. The results will not show under courses.
Get Started
Click on the Course Builder tab under your My Content or the blue Course Builder button.
Then, Click on Create Your First Course in blue. This will give you the steps you need to follow. You will be presented with 3 steps.
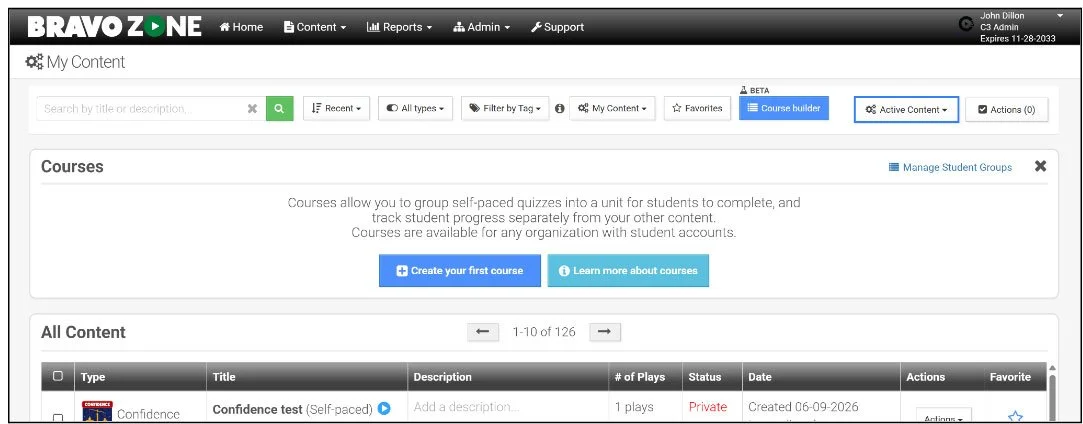
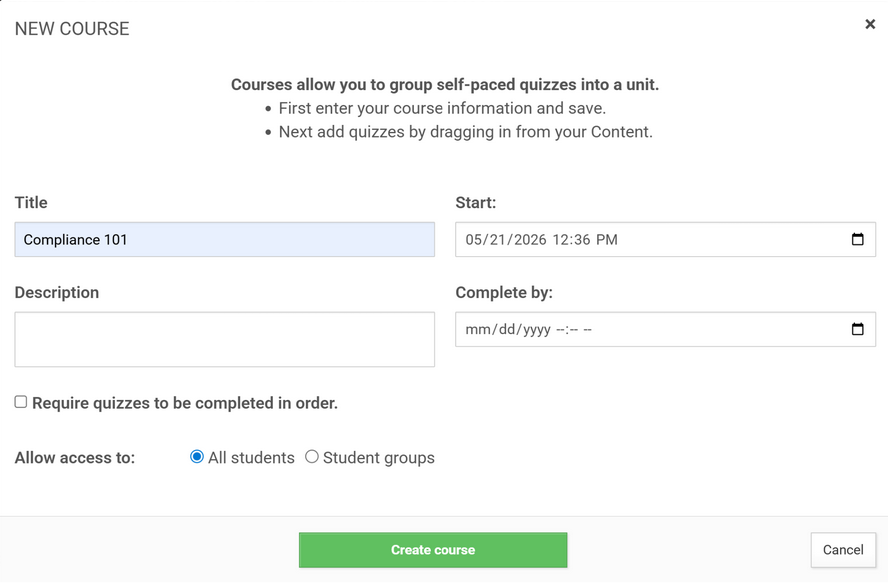
Step 1: Give Your Course a Title
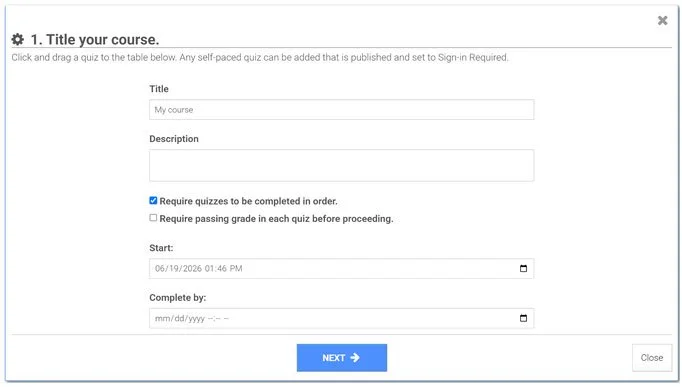
Add a course description, instructions, or notes if desired.
Assign a start date. All start dates will start at the time you created the course unless you specify otherwise.
Complete by date is optional; if a date is selected, the course will disappear from the students' dashboard on the date selected. If left blank, the course will stay posted even after completion.
If you plan on having multiple sessions in a course, you can require quizzes to be completed in order and require a passing grade in each quiz before proceeding.
IMPORTANT NOTE:
Start and completion dates will affect what the student will see on their dashboard. In our example below, the course will show up on the student dashboard on 6/19/2026, and because there is no Complete By: date, the course will stay on the student dashboard indefinitely.
Step 2:
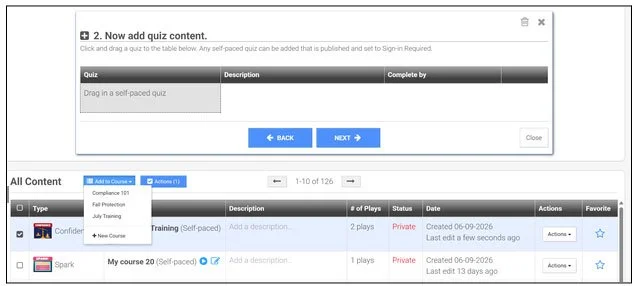
Now Add Quiz Content to a course. You can add just one or multiple quizzes. You can drag and drop or select from the All Content below and add to a course that has been created.
Step 3:
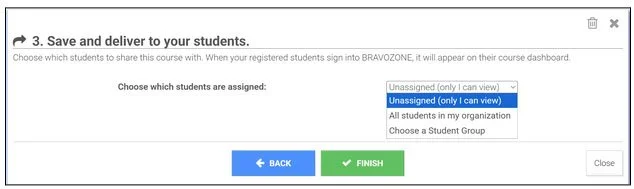
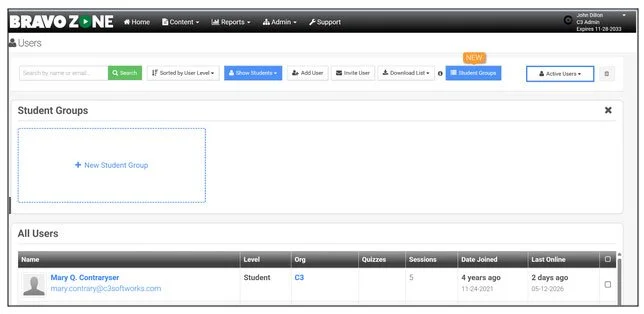
Adding students. You can choose All Students or Use a Student Group. What is a Student Group? If you have no current groups created, click on +Add Student Group. You will be taken to a new page to create your group.
IMPORTANT NOTE:
Only Administrators can create Student Groups. Builders will have access to the Course Builder and any Student Groups created by an administrator, but they will not be able to create new Student Groups. Contact us if you want a builder to have access to student groups, support@c3softworks.com.
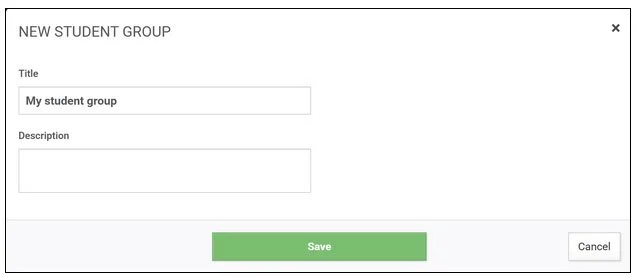
To Create a Student Group
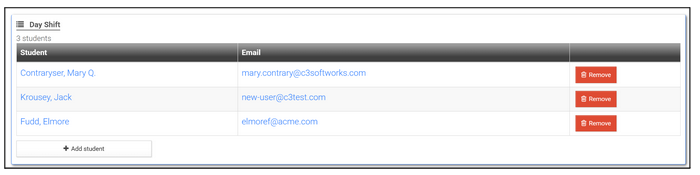
Give your student group a unique name. Examples might include Day Shift, Division Name, Class Time. You can create multiple groups. Students can be added to more than one student group. You can also send URL invites to new users to create a BRAVOZONE account and be assigned to a specific student group. Students can be added to more than one Student Group.
Select Your Students
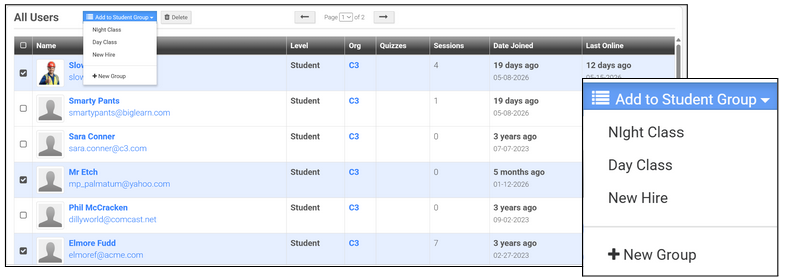
You can drag and drop or select multiple students from the list. Once you select name(s), you will see the option to Add to Student Group. You can create a New Group, or add to an existing group with this feature as well.
Email Users
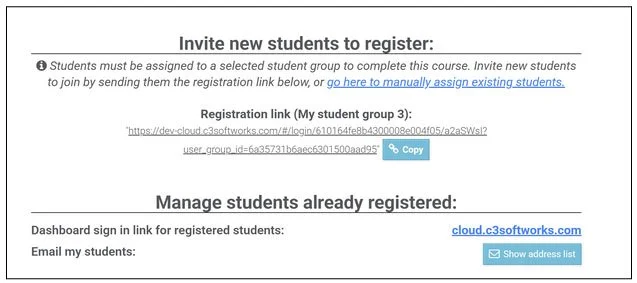
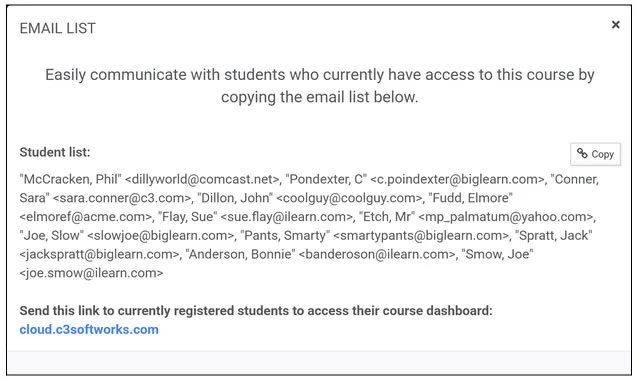
Once you create a course, you can notify them about the course when it is available in their dashboard. To email the group, click on the Show Address List under Manage Students Already Registered. Copy emails from the Student List and send messages from your email. Why your email? It reduces the chances of emails being sent to spam. When you send out a message to your students, it is recommended that you include the URL for cloud.c3softworks.com so they can see their dashboard.
Student Dashboard
The student dashboard was designed to be as simple as possible. Once the student logs in, they will easily see new course assignments. They can also click on Completed assignments to review past sessions, and if a leaderboard is turned on for a session, the student will be able to view it. Students can review detailed reports of completed assignments, and if allowed, can review the detailed report to review.